Cloud Importer Software Guide
Use Cloud Importer Tool and import a local file to any cloud environment in just a couple of clicks. Follow the mentioned steps –
Prerequisites
First Download Free Software from GainTools Webmail Importer Tool Official Page and install in any Windows OS.
Easy Steps to upload Emails to Webmail
Load Webmail Account
Initially, download and launch Webmail Importer Tool on your Windows PC.
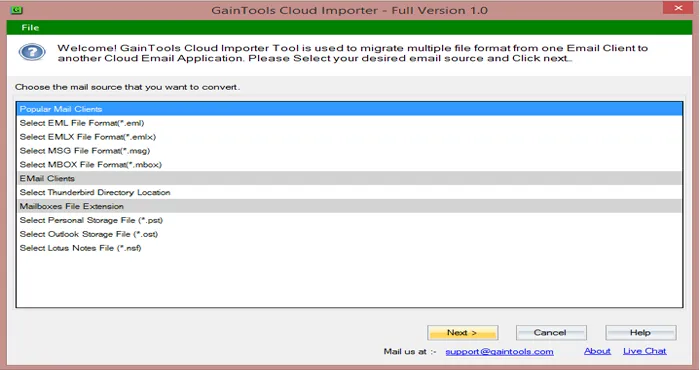
Cloud Importer Software Interface
Browse Email File
Browse Your Data
The next step is to choose a file format. The tool offers multiple file formats like – EML, EMLX, MSG, MBOX, NSF, TGZ. OST, PST, etc. Click Next.
Browse Email Files
Folder or File mode
Folder or File mode
Select Folder or File mode. Go to the Browse button and add the files from the system to the software panel. Click Next.
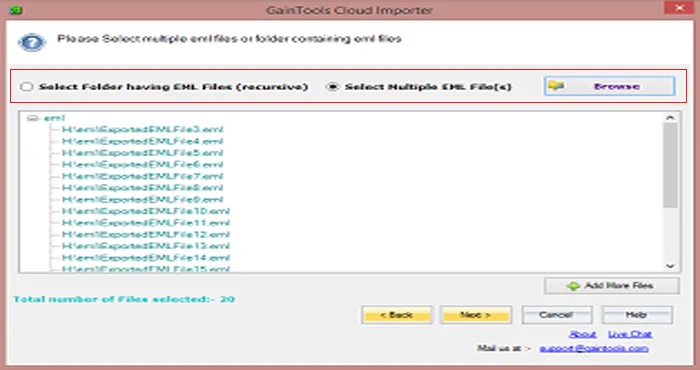
Folder or File mode
Select Webmail
Choose Webmail
Choose a cloud application from the list. If it is not available in the list, click on Export to IMAP Account.
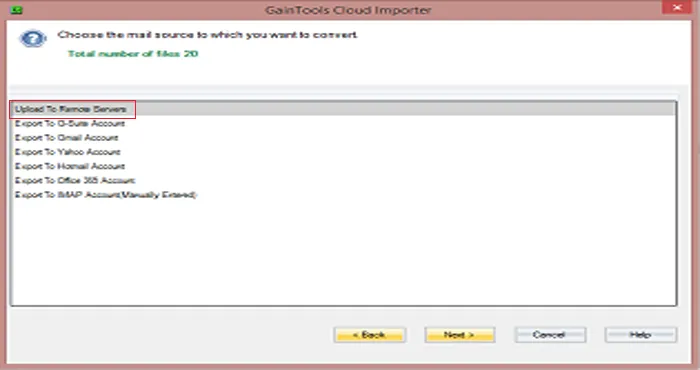
Select Webmail
Authenticate Webmail Account
Authenticate Webmail Account
Provide a valid username and password of your cloud application. Click on the Authenticate User button. (Provide host address in case of IMAP account).
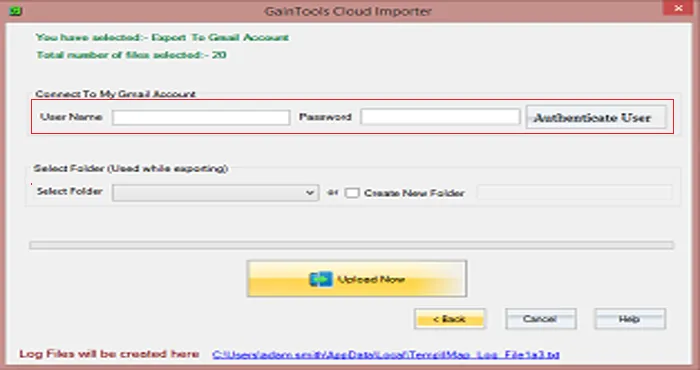
Authenticate Webmail Account
Select destination folder
Select destination folder
Select an existing folder or create a new folder where you want to save the files.
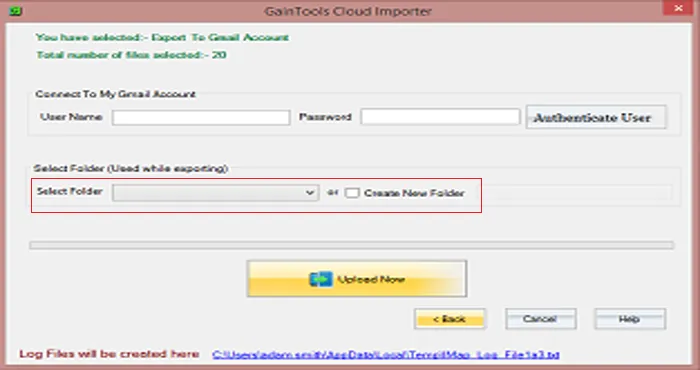
Destination Folder
Upload Now
Upload Now
Finally, click on the Upload Now button. This will start the process of importing.
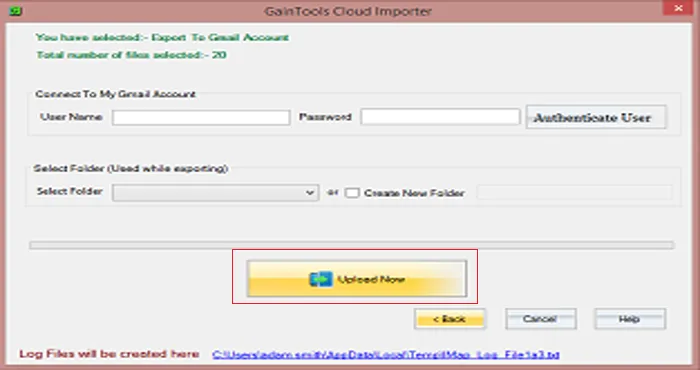
Upload Now
Conversion Complete!
Your email files have been successfully imported to your desired Webmail account. You can now access your uploaded files from the specified email account.