Simple Method to Switch OST in PST
Are you the one struggling with OST to PST convert problem? This blog provides the apt solution to achieve the goal. The blog consisted of important steps for converting damaged OST files into PST. The process will help you to recover the inaccessible OST files into PST file format.
Why Convert OST into PST?
Users must have a query in their mind about why export OST into PST. There are some unavoidable factors where OST PST migration is a necessity. Some of them are as follows:
- Accidental Deletion: Once you convert OST into PST, you can recover the system come across accidental deletion of the mailbox on the Exchange Server.
- Data Migration: By exporting OST PST, users can access migrating data from one system to another. This way out is fruitful when an organization shifts data or location.
- Crash of MS Exchange: Exchange server sometimes comes across the problem of an unexpected crash, system failure, virus/malware attacks, and so on. Because of an unexpected Exchange crash, you are unable to connect with MS Exchange Server. Such situations become worse and tough to handle. Once you convert OST into PST, you will be able to overcome this situation.
- Inaccessibility to Exchange Server: Conversion of OST in PST is highly important for the situations when it is Exchange Server Downtime or Exchange Server Maintenance is scheduled. In such a scenario, you won’t be able to access Exchange Server. It includes the access which are damaged or lost during the downtime. If you want to access those emails then convert OST to PST.
How to Convert OST to PST?
There are various OST PST Conversion Software solutions available in the online marketplace. However, before you try those tools, we recommend you using manual methods when it is to move OST in PST.
Manual method for OST to PST Export:
- First, open Microsoft® Outlook 2013 on your PC.
- Next, click the File tab >> Open >> Export option
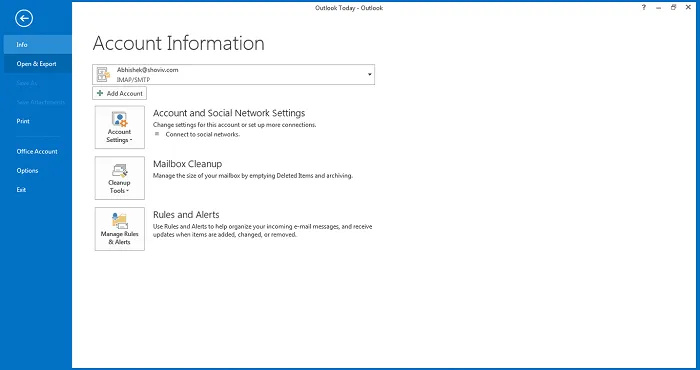
- After this, go to Import/Export after clicking on ‘Open & export option’.
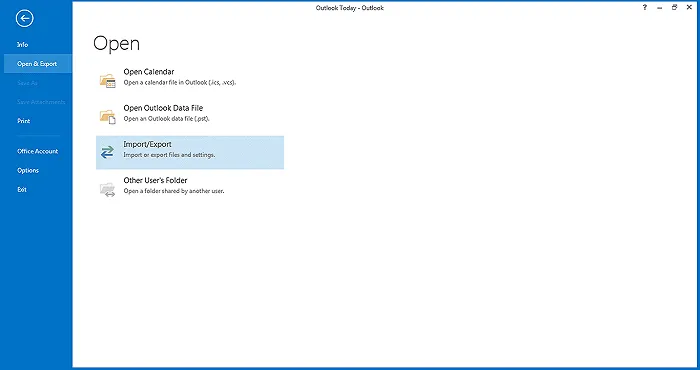
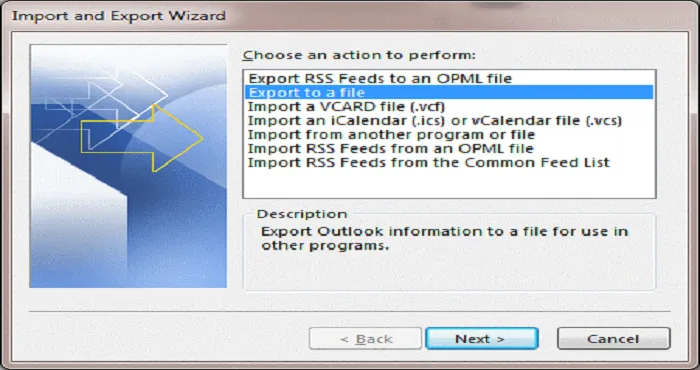
- Click on the Import/Export option, a dialog box will appear in which you will select ‘Export to a file. After this, click "Next" to proceed further.
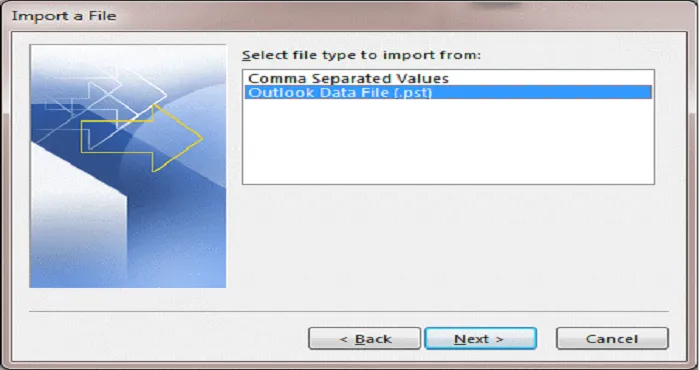
- Click on PST file >> ‘Next’ to carry out with the process further.
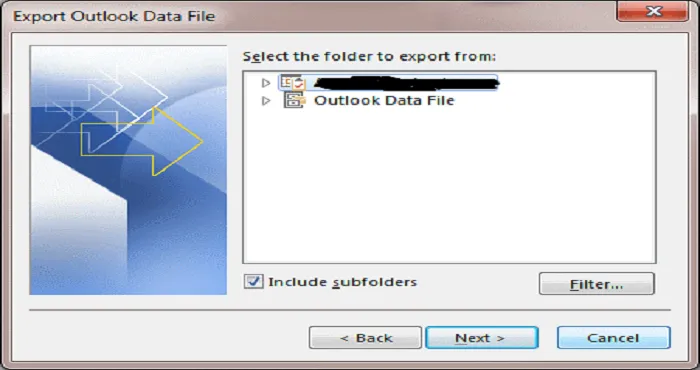
- Choose the folder for exporting from/by choosing the files needed to export and choose next.
- Next, click on ‘Allow duplicates to be created for exporting the files. Next, click "Finish" the program.
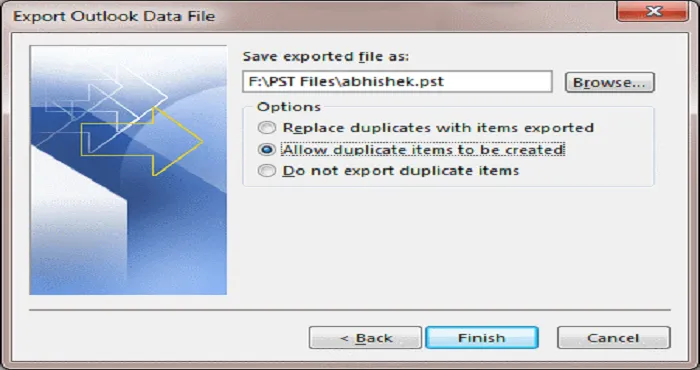
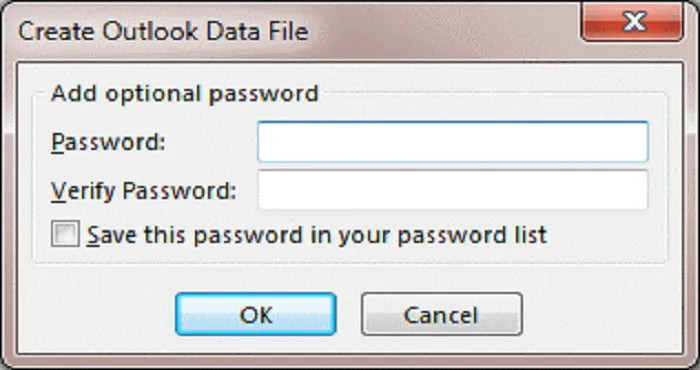
- After getting done with the program, a dialog box will appear which will ask to add an optional password. After this, click OK and the Outlook Profile will be saved to the PST file format in the allotted location.
Although carrying out manual steps can perform the task successfully. However, it does not guarantee data safety.
So what has to be done next?
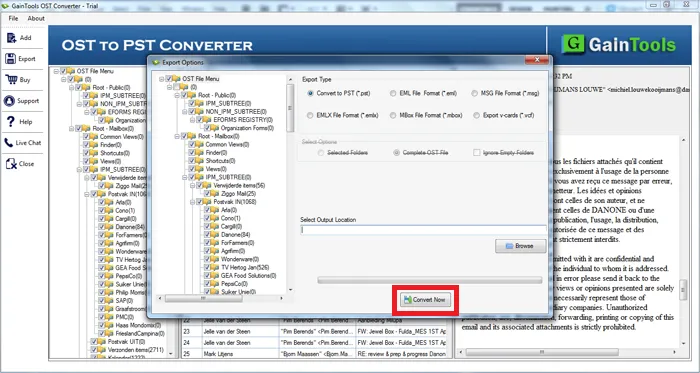
In such a situation, you can look forward to use an external software tool such as Gaintools OST Converter software. To use this software, follow the below-given steps:
- First, download Gaintools OST Converter software using the official website.
- After downloading the software, open it on your system.
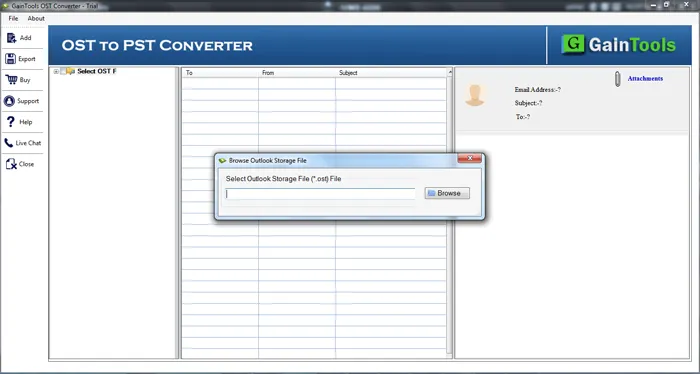
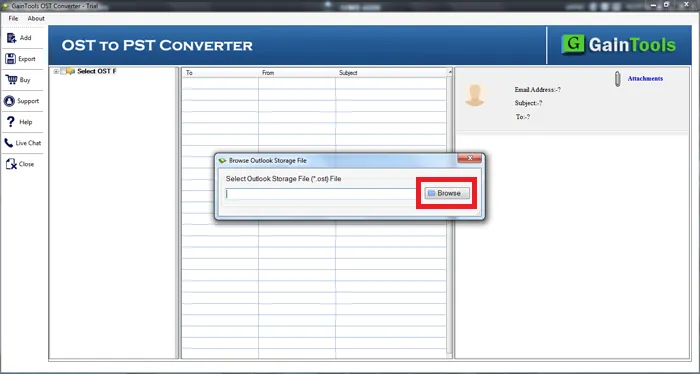
- Now, click on the Browse button and add the OST file.
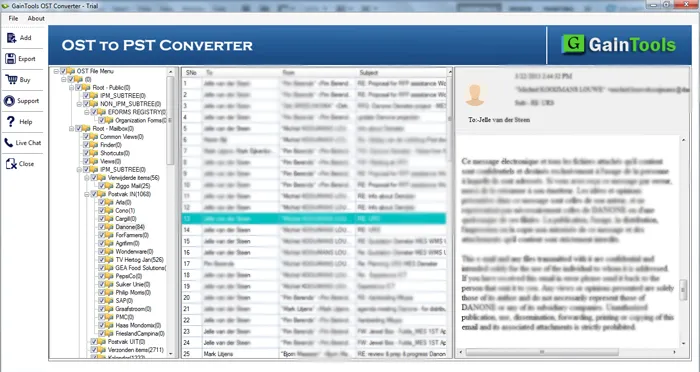
- Now, scan the OST file and get the complete preview of the files. You can select the items which you want to export in PST.
- Choose the PST file format in which you want to export the OST file
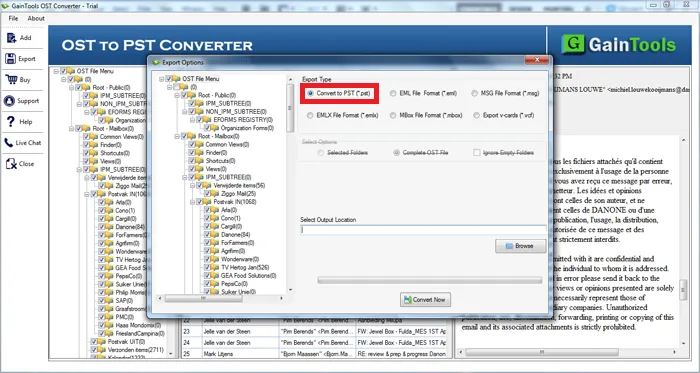
- Select the desired location to save the PST file
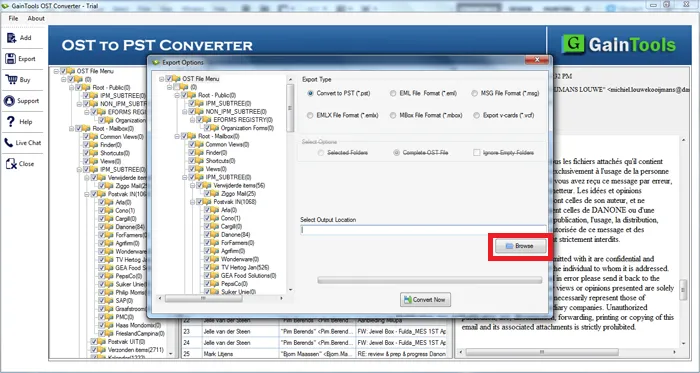
- In the end, Hit the Convert Now button to begin the convert OST to PST process